Credit where credit is due….The bulk of this article was obtained from the excellent article located here: http://www.xors.me/?p=4458
I found the original article and then modified it to fit my operating system and environment. It has been modified to work with Backtrack Linux installation using native virtualbox-4.1 installation
Background
To provide some background, Cuckoo Sandbox performs automated malware analysis using system virtualization technologies. At a high level, Cuckoo executes Python scripts, which then spawn a VirtualBox Virtual Machines (VM) environment running a Guest OS (ie. Windows XP), to execute and analyze malware code in a controlled environment. Once the Guest OS launches, VirtualBox uses local shares to access Python scripts located on the Host OS (ie. Ubuntu/Backtrack). Python therefore needs to be installed on both the Guest and Host OS environments for this product to work. Within the Guest OS, youwill also need vulnerable applications to help analyze code, by forcing malware binary or malicious URLs execution. As the installation documentation provided with Cuckoo Sandbox is missing a few requirements, this post will show a user how to perform a functional install of Cuckoo Sandbox.
A link to the original video is below in avi format.
cuckoo sandbox working under a normal user account
System Requirements:
Backtrack 5 (64Bit) Desktop fully up to date w/ 4 CPU, 16GB Memory, and 1TB Partition
- Install Backtrack to hard disk
- Open a terminal of your choice, I always set my default to terminator.
- Upgrade all your Ubuntu package
[codesyntax lang=”bash”]
# apt-get update
# apt-get upgrade
[/codesyntax]
- Install Python packages (I already had these installed)
[codesyntax lang=”bash”]
# apt-get install python python-magic python-dpkt python-mako
[/codesyntax]
- We also need ssdeep and pyssdeep:
[codesyntax lang=”bash”]
$ wget http://downloads.sourceforge.net/project/ssdeep/ssdeep-2.8/ssdeep-2.8.tar.gz
$ tar xzfvp ssdeep-2.8.tar.gz
$ cd ssdeep-2.8/
$ svn checkout http://pyssdeep.googlecode.com/svn/trunk/ pyssdeep
$ ./configure
$ make
$ sudo make install
$ cd pyssdeep
$ make
$ make install
python setup.py build
running build
running build_ext
python setup.py install
running install
running build
running build_ext
running install_lib
copying build/lib.linux-x86_64-2.6/ssdeepmodule.so -> /usr/local/lib/python2.6/dist-packages
running install_egg_info
Writing /usr/local/lib/python2.6/dist-packages/ssdeep-2.0_0.1.egg-info
$ sudo ldconfig
[/codesyntax]
- Install tcpdump (Backtrack already has this, so you may not need it)
[codesyntax lang=”bash”]
# apt-get install tcpdump
# setcap cap_net_raw,cap_net_admin=eip /usr/local/sbin/tcpdump
[/codesyntax]
- Install git to download from repositories and change to /opt directory
[codesyntax lang=”bash”]
# apt-get install git
# cd /opt
[/codesyntax]
- Install Cuckoo Sandbox
[codesyntax lang=”bash”]
# git clone git://github.com/cuckoobox/cuckoo.git
[/codesyntax]
- Install Oracle VirtualBox (I used the version from default backtrack)
- Virtualbox gets installed to /usr/local/virtualbox
[codesyntax lang=”bash”]
# apt-get install virtualbox-4.1
[/codesyntax]
- Install Oracle VirtualBox (SDK) (updated with the revision correct at the time this was written)
[codesyntax lang=”bash”]
# wget http://download.virtualbox.org/virtualbox/4.1.18/VirtualBoxSDK-4.1.18-78361.zip
# unzip VirtualBoxSDK-4.1.18-78361.zip
# cd /opt/sdk/installer
# export VBOX_INSTALL_PATH=/usr/local/virtualbox
# python vboxapisetup.py install
[/codesyntax]
- Archive the existing sdk files
- move the new SDK files into VirtualBox install directory
[codesyntax lang=”bash”]
# tar czfvp /root/virtualbox-sdk-default.tar.gz /usr/local/virtualbox/sdk
# mv sdk /usr/local/virtualbox/sdk
[/codesyntax]
- Modify Cuckoo Configuration File
[codesyntax lang=”bash”]
# cd /opt/cuckoo/conf
# vi cuckoo.conf
[/codesyntax]
- Make sure the sniffer is enabled / on in the cuckoo.conf file
[codesyntax lang=”bash”]
sniffer = on
[/codesyntax]
- Find the virtual machines section
[codesyntax lang=”bash”]
[VirtualMachines]
# List virtual machines IDs separated by commas.
enabled = cuckoo1

# Make sure the ‘username’ and ‘password’ matches the default logged in user in the Guest OS

#  Leave the ‘share’ section alone, as this is where the Host OS scripts will be stored to share with the Guest OS

[cuckoo1]
name = cuckoo1
username = myWindowsUsername
password = myWindowsPassword
# Please notice that the shared folder name must coincide with the current
# virtual machine id, which is the name you assigned between the square
# brackets (e.g. [cuckoo1]).
share = shares/cuckoo1
[/codesyntax]
Install the Guest OS
I basically took a vm I already had that I knew was clean “WinXPPro” and cloned it to cuckoo1 in my default ~/VirtualBox VMs folder
Make sure you create a VM name ‘cuckoo1′ running Windows XP (SP3) or Windows 7; For Windows XP use 256 MB or Windows 7 use 1024 MB of memory. For the Hard Drive (HD) parameters, select ‘fixed storage’ for better performance. The HD storage space will depend on what you want to install, meaning the ‘vulnerable’ application to use (ie. MS Office, Adobe Reader, etc.)
Please Note: Make sure you create or change your default user account in Windows to match what we configured in the cuckoo.conf file. Make sure you also change the user account password to reflect what is in the .conf file.
Install Python In Guest OS
- Download Python 2.7 for Guest OS and let it install into the default location C:\Python2.7\
http://www.python.org/getit/releases/2.7/
- Disable Guest OS Firewall
- Go to the Network Adapter Advanced Settings and disable the running Guest OS Windows Firewall
- Install VirtualBox Oracle VM VirtualBox Guest Additions
- Select Devices/Install Guest Additions… (Reboot of OS is required)
Configuring Virtual Machine for Cuckoo Sandbox
- Enable Network .PCAP Dump
[codesyntax lang=”bash”]
$ sudo mkdir -p /opt/cuckoo/shares/cuckoo1
$ VBoxManage controlvm cuckoo1 poweroff
$ VBoxManage modifyvm cuckoo1 --nictrace1 on --nictracefile1 /opt/cuckoo/shares/cuckoo1/dump.pcap
[/codesyntax]
- Creating Guest OS Shared Folders (to obtain Host OS Python scripts access used by Cuckoo)
[codesyntax lang=”bash”]
$ VBoxManage sharedfolder add cuckoo1 --name setup --hostpath /opt/cuckoo/shares/setup
$ VBoxManage sharedfolder add cuckoo1 --name cuckoo1 --hostpath /opt/cuckoo/shares/cuckoo1
[/codesyntax]
Installing Guest OS Vulnerable Applications
- start the virtual machine
[codesyntax lang=”bash”]
$ VBoxManage startvm cuckoo1
Waiting for VM "cuckoo1" to power on...
VBoxManage: error: Netsniffer cannot open '/opt/cuckoo/shares/cuckoo1/dump.pcap' for writing. The directory must exist and it must be writable for the current user (VERR_ACCESS_DENIED)
VBoxManage: error: Details: code NS_ERROR_FAILURE (0x80004005), component Console, interface IConsole, callee
[/codesyntax]
The above error is because I want to run this as a normal user and not root…..just seems scary to be analyzing malware as root. So I created my virtualbox image as a normal user. The fix is easy though.
[codesyntax lang=”bash”]
$ ls -la /opt/cuckoo/shares/cuckoo1/dump.pcap
ls: cannot access /opt/cuckoo/shares/cuckoo1/dump.pcap: No such file or directory

$ ls -la /opt/cuckoo/shares/cuckoo1
total 8
drwxr-xr-x 2 root root 4096 2012-07-12 21:01 .
drwxr-xr-x 4 root root 4096 2012-07-12 21:01 ..

$ sudo chown -R MY_USERNAME /opt/cuckoo/shares/cuckoo1
$ VBoxManage startvm cuckoo1
Waiting for VM "cuckoo1" to power on...
VM "cuckoo1" has been successfully started.
[/codesyntax]
Next you can download old versions of applications from http://www.oldapps.com and install them into the Guest OS. You will also want to verify the shares are working in the guest os. So click start, run, and type:
[codesyntax lang=”bash”]
\\vboxsvr
[/codesyntax]
You should see two shares
- \\vboxsvr\setup
- \\vboxsvr\cuckoo1
Please Note: connecting to the shares is important. Make sure you do not forget this step otherwise Cuckoo would quickly close the VM afterwards, without analyzing code.
Verify Guest OS is ready for malware analysis
- Reboot the Guest OS
- log in and leave it running for 5 – 10 minutes.
- Make sure:
- All OS or Application Updates are disabled.
- All Applications are launched at least once, to accept default Licensing Agreements.
- Make sure you disabled the Guest OS Firewall.
- Once you are satisfied that nothing unwanted will pop-up or prompt you during the malware analysis stage continue to the next step.
- Create a Guest OS Clean Snapshot
[codesyntax lang=”bash”]
$ VBoxManage snapshot cuckoo1 take baseImage --pause
$ VBoxManage controlvm cuckoo1 poweroff
$ VBoxManage snapshot cuckoo1 restorecurrent
[/codesyntax]
- Testing Cuckoo Sandbox (for the First Time)
[codesyntax lang=”bash”]
$ cd /opt/cuckoo
$ ./cuckoo.py

                     _
    ____ _   _  ____| |  _ ___   ___
   / ___) | | |/ ___) |_/ ) _ \ / _ \
  ( (___| |_| ( (___|  _ ( |_| | |_| |
   \____)____/ \____)_| \_)___/ \___/

 Cuckoo Sandbox v0.3.3-dev
 www.cuckoobox.org
 Copyright (c) 2010-2012

ERROR: Unable to create folder "log": [Errno 13] Permission denied: 'log'
[/codesyntax]
The fix for the unable to create folder log was easy:
[codesyntax lang=”bash”]
$ cd /opt
$ sudo chown -R MY_USERNAME cuckoo
[/codesyntax]
Make sure you replace MY_USERNAME with whatever your login username is for your install. The next time we run cuckoo, all is fine now:
[codesyntax lang=”bash”]
$ ./cuckoo.py

  eeee e   e eeee e   e  eeeee eeeee
  8  8 8   8 8  8 8   8  8  88 8  88
  8e   8e  8 8e   8eee8e 8   8 8   8
  88   88  8 88   88   8 8   8 8   8
  88e8 88ee8 88e8 88   8 8eee8 8eee8

 Cuckoo Sandbox v0.3.3-dev
 www.cuckoobox.org
 Copyright (c) 2010-2012

[2012-07-12 22:04:30,322] [Core.Init] INFO: Started.
[2012-07-12 22:04:30,644] [Core.VirtualBox.Check] INFO: Your VirtualBox version is: "4.1.18", good!
[2012-07-12 22:04:30,644] [Core.Init] INFO: Populating virtual machines pool...
[2012-07-12 22:04:31,159] [Core.VirtualBox.Restore] INFO: Virtual machine "cuckoo1" successfully restored to current snapshot.
[2012-07-12 22:04:31,660] [Core.VirtualBox.Infos] INFO: Virtual machine "cuckoo1" information:
[2012-07-12 22:04:31,660] [Core.VirtualBox.Infos] INFO: 	\_| Name: cuckoo1
[2012-07-12 22:04:31,661] [Core.VirtualBox.Infos] INFO: 	  | ID: e562a96e-9b5e-4d4f-866d-a9700345ef3c
[2012-07-12 22:04:31,661] [Core.VirtualBox.Infos] INFO: 	  | OS Type: WindowsXP
[2012-07-12 22:04:31,661] [Core.VirtualBox.Infos] INFO: 	  | VRAM Size: 16 MB
[2012-07-12 22:04:31,662] [Core.VirtualBox.Infos] INFO: 	  | CPU Count: 1 Core/s
[2012-07-12 22:04:31,662] [Core.VirtualBox.Infos] INFO: 	  | Memory Size: 4096 MB
[2012-07-12 22:04:31,662] [Core.VirtualBox.Infos] INFO: 	  | State: Saved
[2012-07-12 22:04:31,663] [Core.VirtualBox.Infos] INFO: 	  | Current Snapshot: "baseImage"
[2012-07-12 22:04:31,663] [Core.VirtualBox.Infos] INFO: 	  | MAC Address: 08:00:27:8F:7E:69
[2012-07-12 22:04:31,663] [Core.Init] INFO: 1 virtual machine/s added to pool.
[2012-07-12 22:04:31,859] [Core.CuckooDatabase] INFO: Generated database "db/cuckoo.db" which didn't exist before.
[/codesyntax]
Testing Cuckoo Sandbox w/ Malware
- Open a new Terminal (Ctrl-Alt-T)
- change to the /opt/cuckoo directory
[codesyntax lang=”bash”]
$ cd /opt/cuckoo
[/codesyntax]
Cuckoo Sandbox Submission Utility
There are numerous ways to submit samples to cuckoo for analysis. The following are some examples:
Submit a local binary
[codesyntax lang=”bash”]
$ ./submit.py /path/to/binary
[/codesyntax]
Submit a local binary and specify an higher priority
[codesyntax lang=”bash”]
$ ./submit.py /path/to/binary –priority 5
[/codesyntax]
Submit a local binary and specify a custom analysis timeout of 60 seconds
[codesyntax lang=”bash”]
$ ./submit.py /path/to/binary –timeout 60
[/codesyntax]
Submit a local binary and specify a custom analysis package
[codesyntax lang=”bash”]
$ ./submit.py /path/to/binary –package <name of package>
[/codesyntax]
Submit an URL to be downloaded locally and analyzed
[codesyntax lang=”bash”]
$ ./submit.py –download http://www.website.tld/file.exe
[/codesyntax]
Submit an URL to be analyzed within Internet Explorer
[codesyntax lang=”bash”]
$ ./submit.py –url http://maliciousurl.tld/exploit.php
[/codesyntax]
Submit a local binary to be run on virtual machine cuckoo1
[codesyntax lang=”bash”]
$ ./submit.py /path/to/binary –machine cuckoo1
[/codesyntax]
So I did a url in one terminal and below is the command along with the results:
[codesyntax lang=”bash”]
$ ./submit.py –url http://maliciousurl.tld/exploit.php
[2012-07-12 22:41:22,563] [Core.Dispatcher] INFO: Acquired analysis task for target “/tmp/9392e29d9a6ca8733a657dad9eccb21b.url”.
[2012-07-12 22:41:22,720] (Task #4) [Core.Analysis.Run] INFO: Acquired virtual machine “cuckoo1”.
[2012-07-12 22:41:22,723] [Core.Sniffer.Start] INFO: Sniffer started monitoring 08:00:27:8F:7E:69.
tcpdump: listening on eth0, link-type EN10MB (Ethernet), capture size 1515 bytes
[2012-07-12 22:41:23,176] [Core.VirtualBox.Restore] INFO: Virtual machine “cuckoo1” successfully restored to current snapshot.
[2012-07-12 22:41:27,302] [Core.VirtualBox.Start] INFO: Virtual machine “cuckoo1” starting in “gui” mode.
[2012-07-12 22:41:27,345] [Core.VirtualBox.Execute] INFO: Cuckoo analyzer running with PID 1 on virtual machine “cuckoo1”.
[2012-07-12 22:41:27,494] [Core.VirtualBox.Execute] INFO: Cuckoo analyzer exited with code 0 on virtual machine “cuckoo1”.
0 packets captured
0 packets received by filter
0 packets dropped by kernel
[2012-07-12 22:41:27,494] [Core.Sniffer.Stop] INFO: Sniffer stopped monitoring 08:00:27:8F:7E:69.
[2012-07-12 22:41:27,495] (Task #4) [Core.Analysis.SaveResults] INFO: Analysis results successfully saved to “analysis/4”.
[2012-07-12 22:41:27,676] (Task #4) [Core.Analysis.Processing] INFO: Analysis results processor started with PID “7556”.
[2012-07-12 22:41:27,699] [Processor] INFO: Post-analysis processing started.
[2012-07-12 22:41:27,699] [Processor] INFO: Starting processing of results at path “analysis/4”.
[2012-07-12 22:41:27,805] [Processing.Processes] ERROR: Analysis results folder does not exist at path “analysis/4/logs”.
[2012-07-12 22:41:28,017] [Processor] INFO: Post-analysis processing completed.
[2012-07-12 22:41:28,105] [Core.VirtualBox.Stop] INFO: Virtual machine “cuckoo1” powered off successfully.
[2012-07-12 22:41:28,106] (Task #4) [Core.Analysis.FreeVM] INFO: Virtual machine “cuckoo1” released.
[2012-07-12 22:41:28,106] (Task #4) [Core.Analysis.Run] INFO: Analyis completed.
[/codesyntax]
Some Additional Tips
If the VM closes very quickly, after spawning, it is a result of either:
- Guest OS username or password does not match what is in the cuckoo.conf file.
- You did not manually connect to the \\vboxsvr\setup and \\vboxsvr\cuckoo1 shares, to cache the session.
- Your \\vboxsvr shares are not mapped to the proper Host OS (ie. /opt/cuckoo/shares) paths.
- Something is not correct when you enabled your .pcap dump file.
You can also enable debug logging to help you out:
[codesyntax lang=”bash”]
# vi /opt/cuckoo/conf/cuckoo.conf

[Logging]
# Enable/Disable additional debugging messages. This messages won’t wrote to
# log file but just printed on screen. [on/off]
debug = on
[/codesyntax]
Error: Analysis results folder does not exist at path “analysis/{some number}/logs”
Someone pointed out that even my own instructions had the Error: Analysis results folder does not exist at path “analysis/{some number}/logs”
If you make changes to the Guest vm, you need to save the state over again, otherwise it will simply be restored to the state in which it was when you first issued the command “VBoxManage snapshot cuckoo1 take baseImage –pause”. I created this document before having a working copy and forgot to modify it after it was working. Basically my user in the Guest OS did not have a password but I had a password in the cuckoo.conf file for the user. You will get the above error if you change or create a new password for the user defined in the cuckoo.conf file or if the password is incorrect. The fix is really simple:
[codesyntax lang=”bash”]
# start the vm
# Go to Control Panel - Users - Select Your Username
# Create Password
# enter the password
# Select OK and close any open windows until back at the desktop
# leave the vm running
# Now issue these commands in the following order:
 $ VBoxManage snapshot cuckoo1 take baseImage --pause

 $ VBoxManage controlvm cuckoo1 poweroff

 $ VBoxManage snapshot cuckoo1 restorecurrent
$ VBoxManage controlvm cuckoo1 poweroff
[/codesyntax]
After you do the above, simply poweron the virtual machine and make sure you have a password prompt. Make sure the password you enter matches the one in the cuckoo.conf file.
Another cause of the above error message is if you simply submitted a faulty/corrupt malware sample. To prove my set-up is in fact working, here are some screen shots of an analysis (I don’t want to post all 50 pages as images so just the first few):
$ lynx reports/report.html

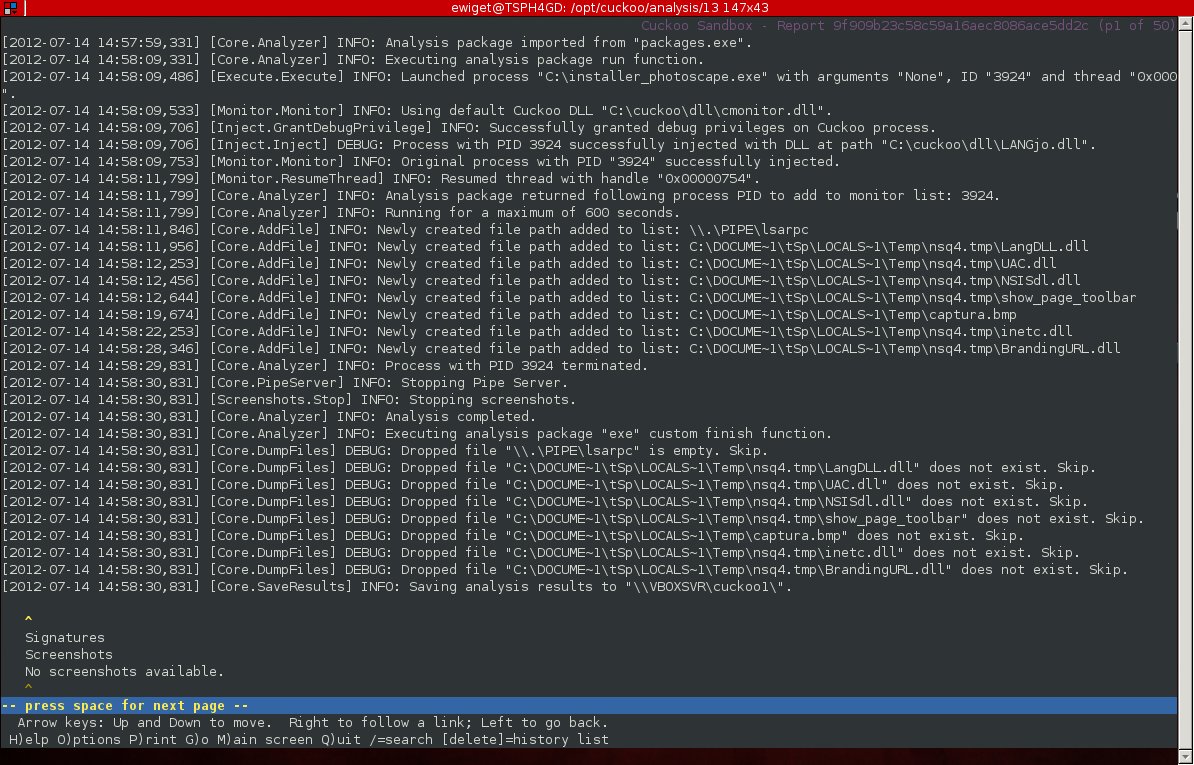
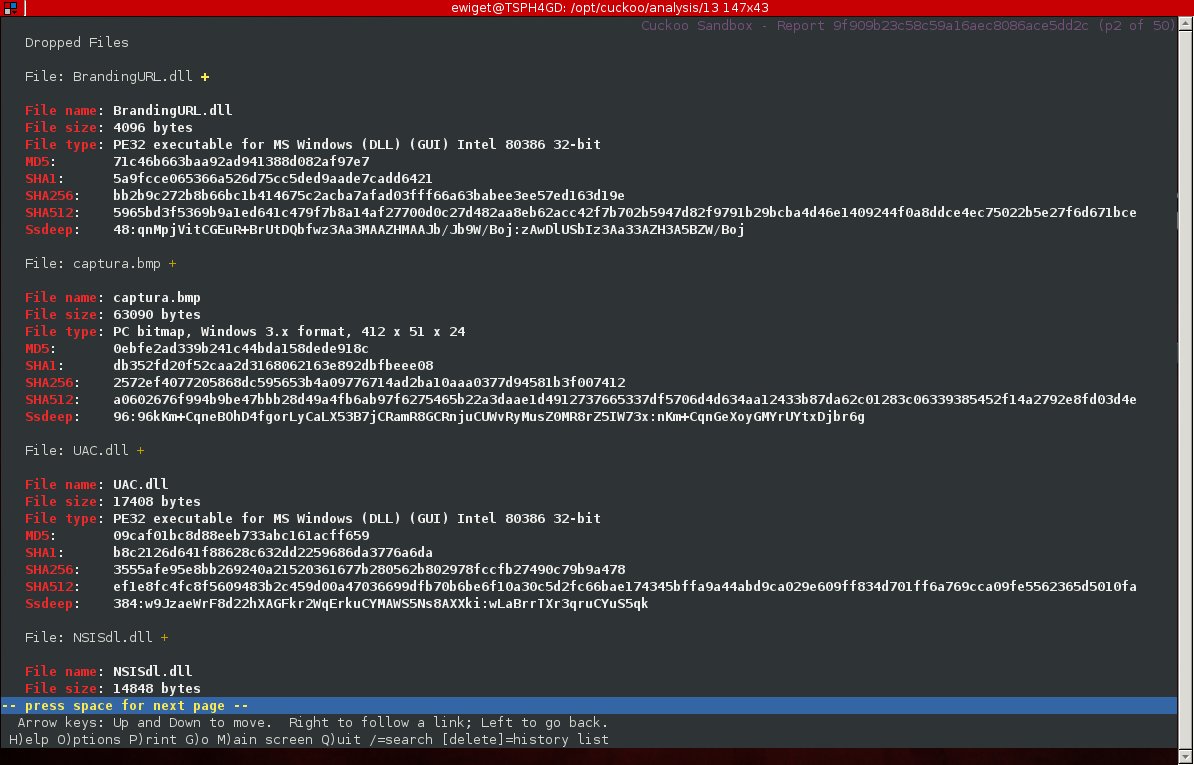
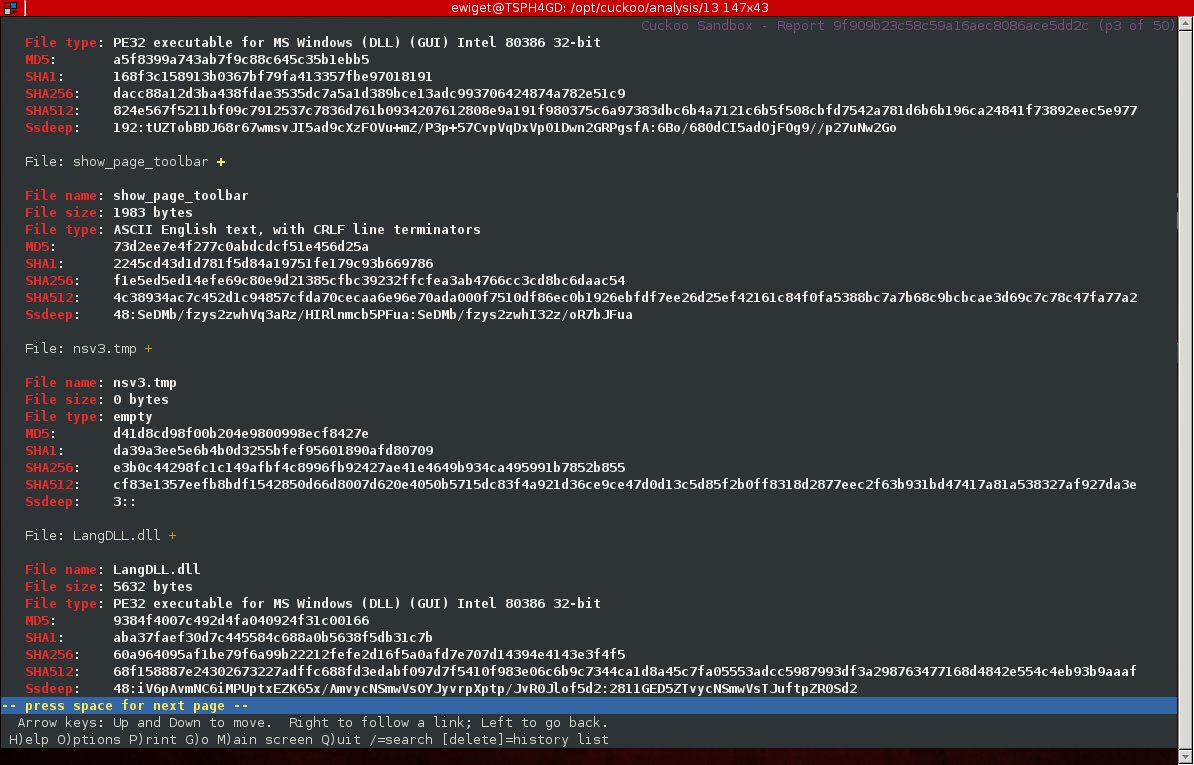
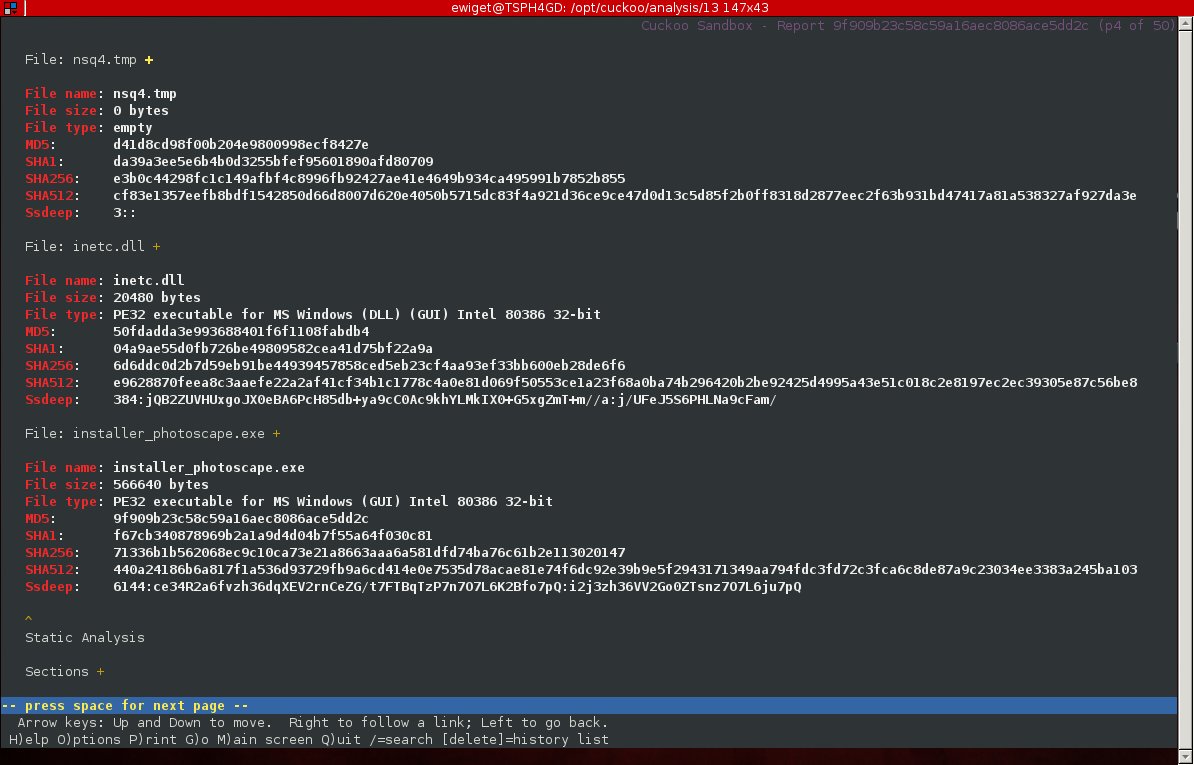
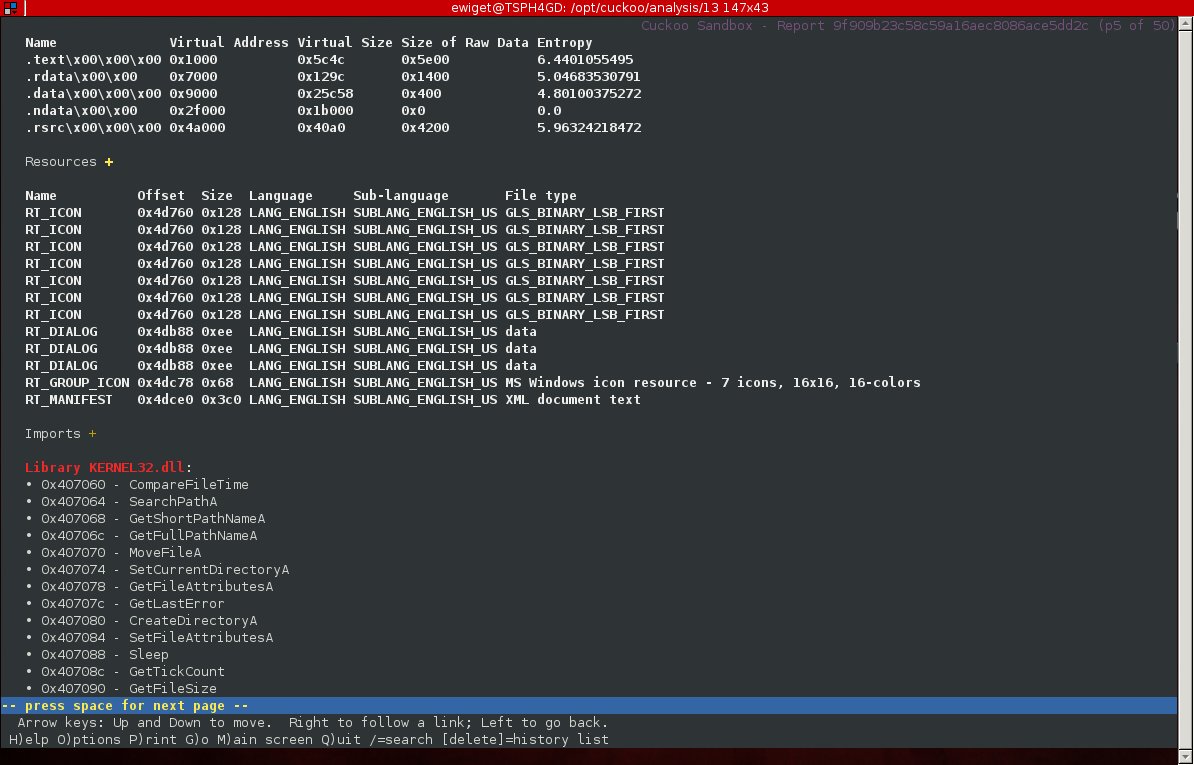
Cuckoo Sandbox Malware Results
All the results are kept in the /opt/cuckoo/analysis directory. You can also spawn the Cuckoo Sandbox Web Analyzer, which is very pretty:
[codesyntax lang=”bash”]
# cd /opt/cuckoo
# ./web.pl
[/codesyntax]
Now launch Firefox in Ubuntu and go to http://127.0.0.1:8080
You can also do like I did and just launch lynx:
[codesyntax lang=”bash”]
$ lynx /opt/cuckoo/analysis/1/reports/report.html
[/codesyntax]
Leave a Reply
You must be logged in to post a comment.